The very first step that you need to do is to create a client to connect:
Easy installation of Openvpn - just 2 minutes and your personal VPN is ready.
Tested on Ubuntu Server 18.04 LTS, 64-bit version. Minimum.
Run the script and follow the assistant's instructions:
# wget https://git.io/vpn -O openvpn-install.sh && bash openvpn-install.sh

Next, select the recommended Protocol and port:

Choose what you need from the list:

Creating a client, naming it to get a file with the required .ovpn extension to connect the client via OpenVPN:

The tun / tap setting is usually disabled on OpenVZ. We recommend you to use KVM or XEN.
You can check tun / tap with the following command
#cat / dev / net / tun
"cat: / dev / net / tun: File descriptor in bad state"
"File descriptor in bad state" means that the tun / tap function is active, otherwise ask your provider to activate it.
After creating the file, install the OpenVPN client application for your operating system (you can download the application from the link: https://openvpn.net/community-downloads /). Run the installation file. The Installation wizard opens. Follow the on-screen instructions to install the app.

Download and upload the OpenVPN connection configuration file (.ovpn file).
(How to create a file is described at the very beginning)
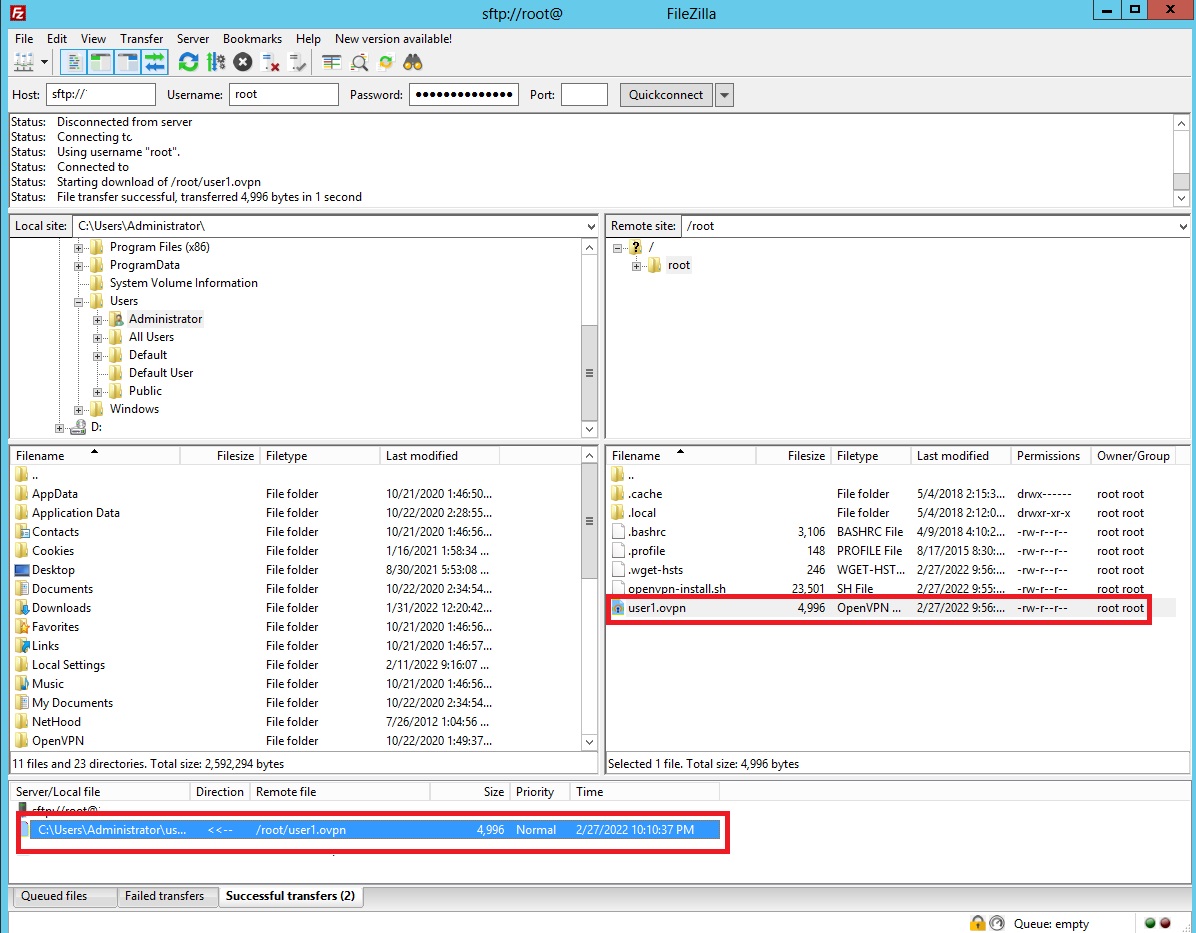
This procedure is required only during the initial connection setup. It can be downloaded via FileZilla (you can download the application from the link: https://filezilla-project.org /).
Also, to download files, you can use: https://winscp.net/eng/download.php
Connect, enter the IP address, root username and password.

Uploading a file named user1. We need to download the file you created (Easy-installation-of-Openvpn). With which you dare to connect.
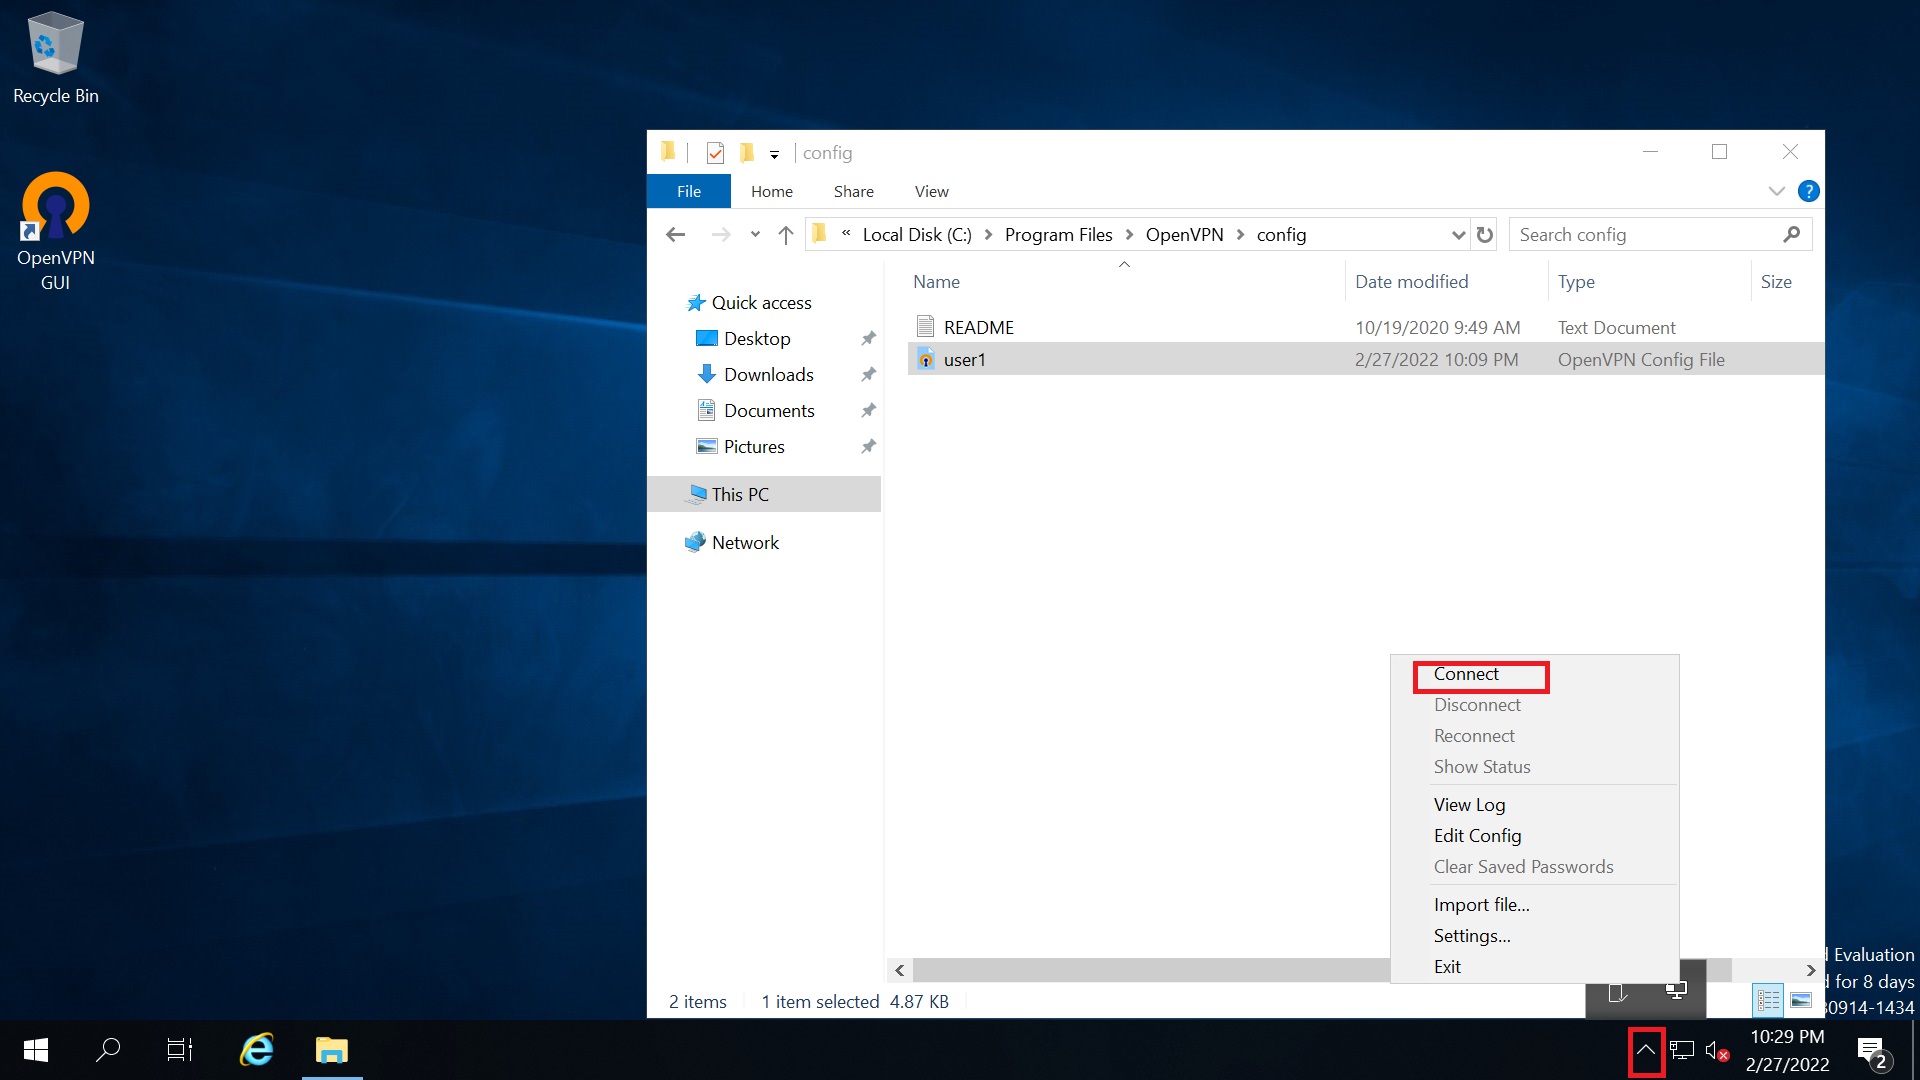
After saving the file on your computer, it will be displayed as an OpenVPN icon.
You need to move the *.ovpn file to the "config" folder of the main OpenVPN installation directory.

Connecting. To connect, follow the steps shown in the image below.
The VPN connection starts. The connection status will be displayed on the screen.

The VPN connection has been successfully established.
